Claude
Connect Demandbase to Claude
Add the Demandbase Model Context Protocol (MCP) server to Claude as a custom connector to access Demandbase account, person, engagement, company, contact, technographic, hierarchy, and news data directly from a conversation.
Note: These steps use Claude's remote custom connector experience available as of July 16, 2026. The options you see can depend on your Claude plan, organization role, and administrator settings.
Prerequisites
Before you begin, make sure you have:
- A Claude account that can use remote custom connectors. Custom connectors are available on Free, Pro, Max, Team, and Enterprise plans. Free accounts can add one custom connector.
- A Demandbase user account that can complete your organization's Demandbase sign-in flow.
- Demandbase MCP enabled for your organization. Contact your Demandbase Account Team or Demandbase Support if it is not enabled.
For Claude Team and Enterprise organizations, an Owner or Primary Owner must add the custom connector to the organization before members can connect their individual accounts.
Demandbase MCP Connection Details
Use these values when configuring the connector:
- Name:
Demandbase - Remote MCP server URL:
https://gateway.demandbase.com/mcp/servers/db-mcp
Important: Do not enter an OAuth client ID or client secret. Demandbase supports OAuth Dynamic Client Registration for this connection.
Step 1: Open Connectors
- In Claude, from the left navigation bar, open Customize.
- Select Connectors.
Team and Enterprise administrators
An Owner or Primary Owner must first:
- Go to Organization settings > Connectors.
- Click Add.
- Hover over Custom and select Web.
- Add the Demandbase MCP server URL.
- Click Add.
After the organization connector is available, users can go to Customize > Connectors and connect their Demandbase account.
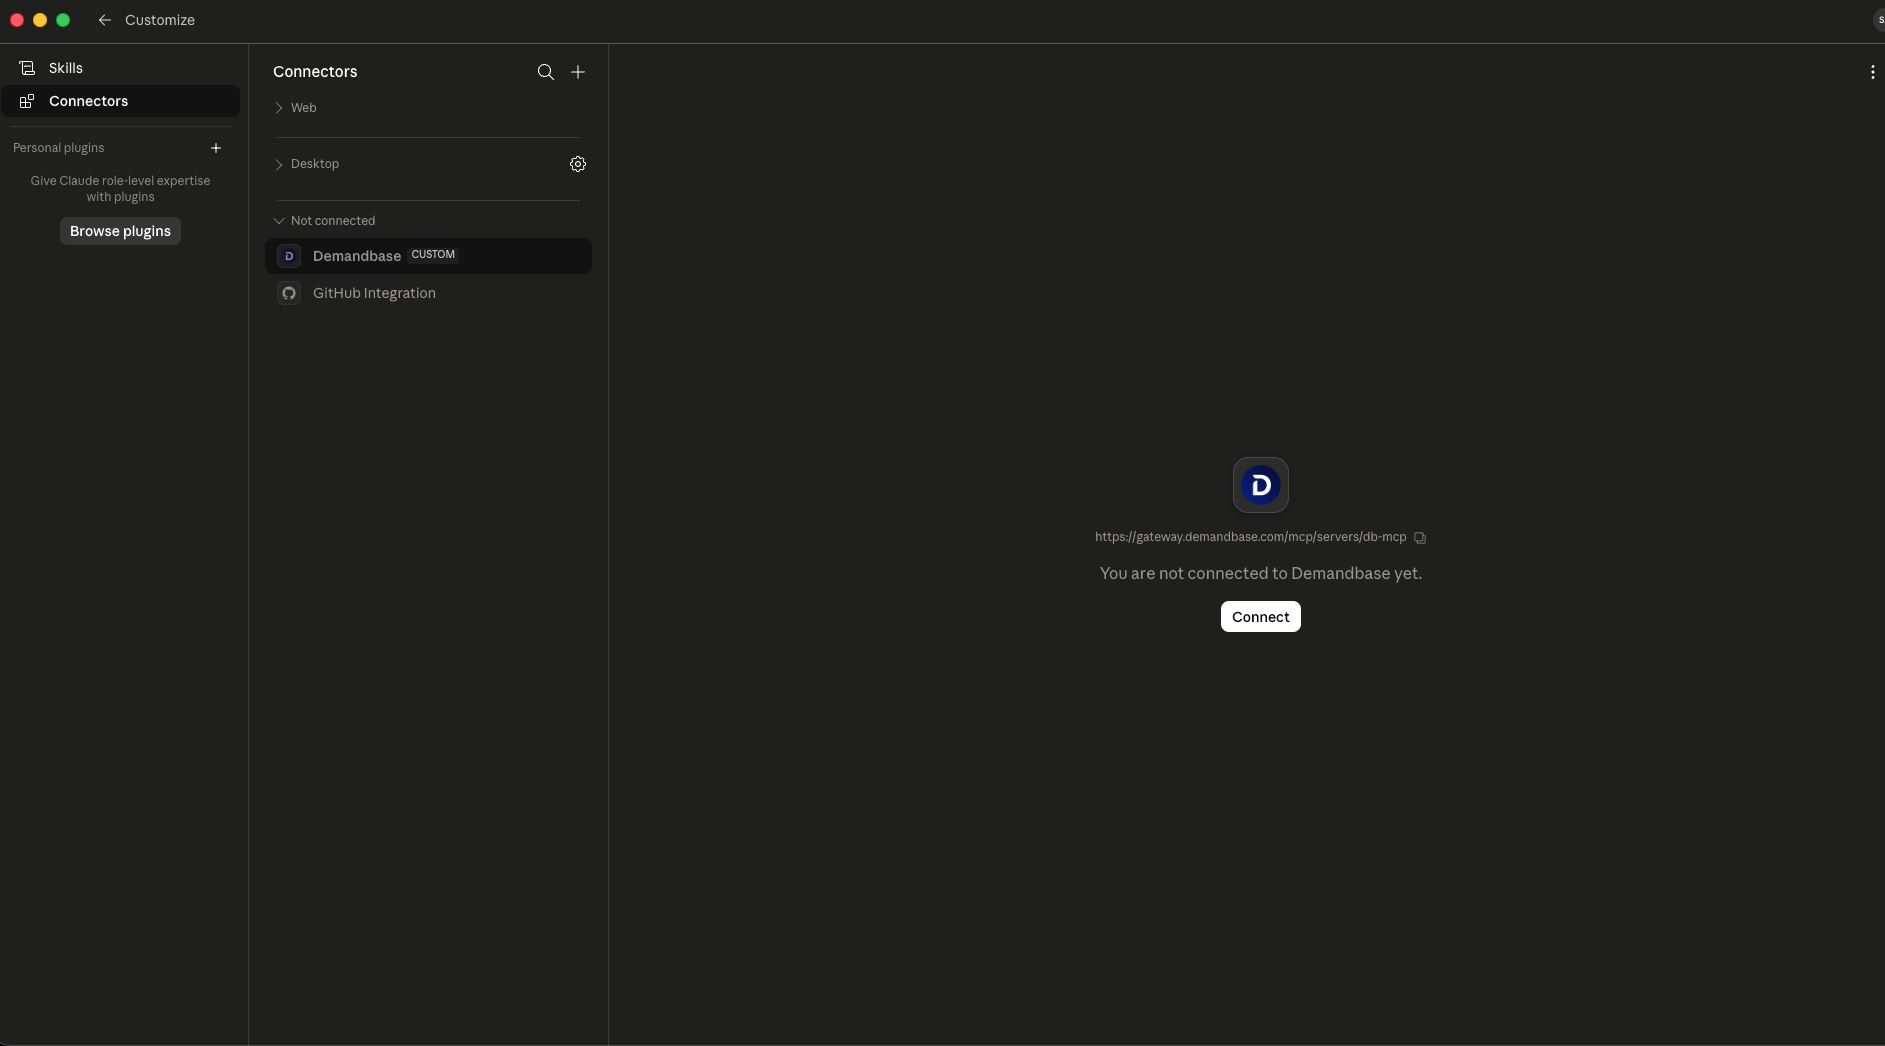
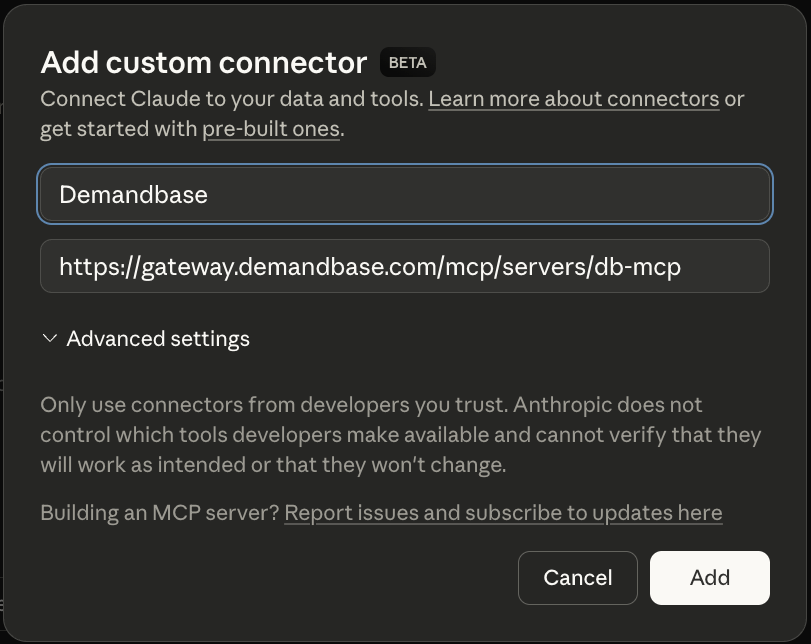
Step 2: Add the Demandbase Custom Connector
For an individual Free, Pro, or Max accounts:
-
Next to Connectors, click the + button.
-
Click Add custom connector.
-
Enter
Demandbaseas the connector name. -
Enter
https://gateway.demandbase.com/mcp/servers/db-mcpas the remote MCP server URL. -
Click Add.
Step 3: Connect Your Demandbase Account
- Find Demandbase in the Connectors list.
Tip: Custom connectors display a CUSTOM label. - Select Demandbase.
- Click Connect.
- Complete your organization's Demandbase sign-in and authorization flow.
Tip: If you already have an active Demandbase session, authorization completes automatically and returns you to Claude.
After successful authorization, the connector status changes to Connected.
Step 4: Enable Demandbase in a Conversation
-
Start a new Claude conversation.
-
In the lower-left corner of the composer, click the + button.
-
Go to Connectors.
-
Turn on Demandbase for the conversation.
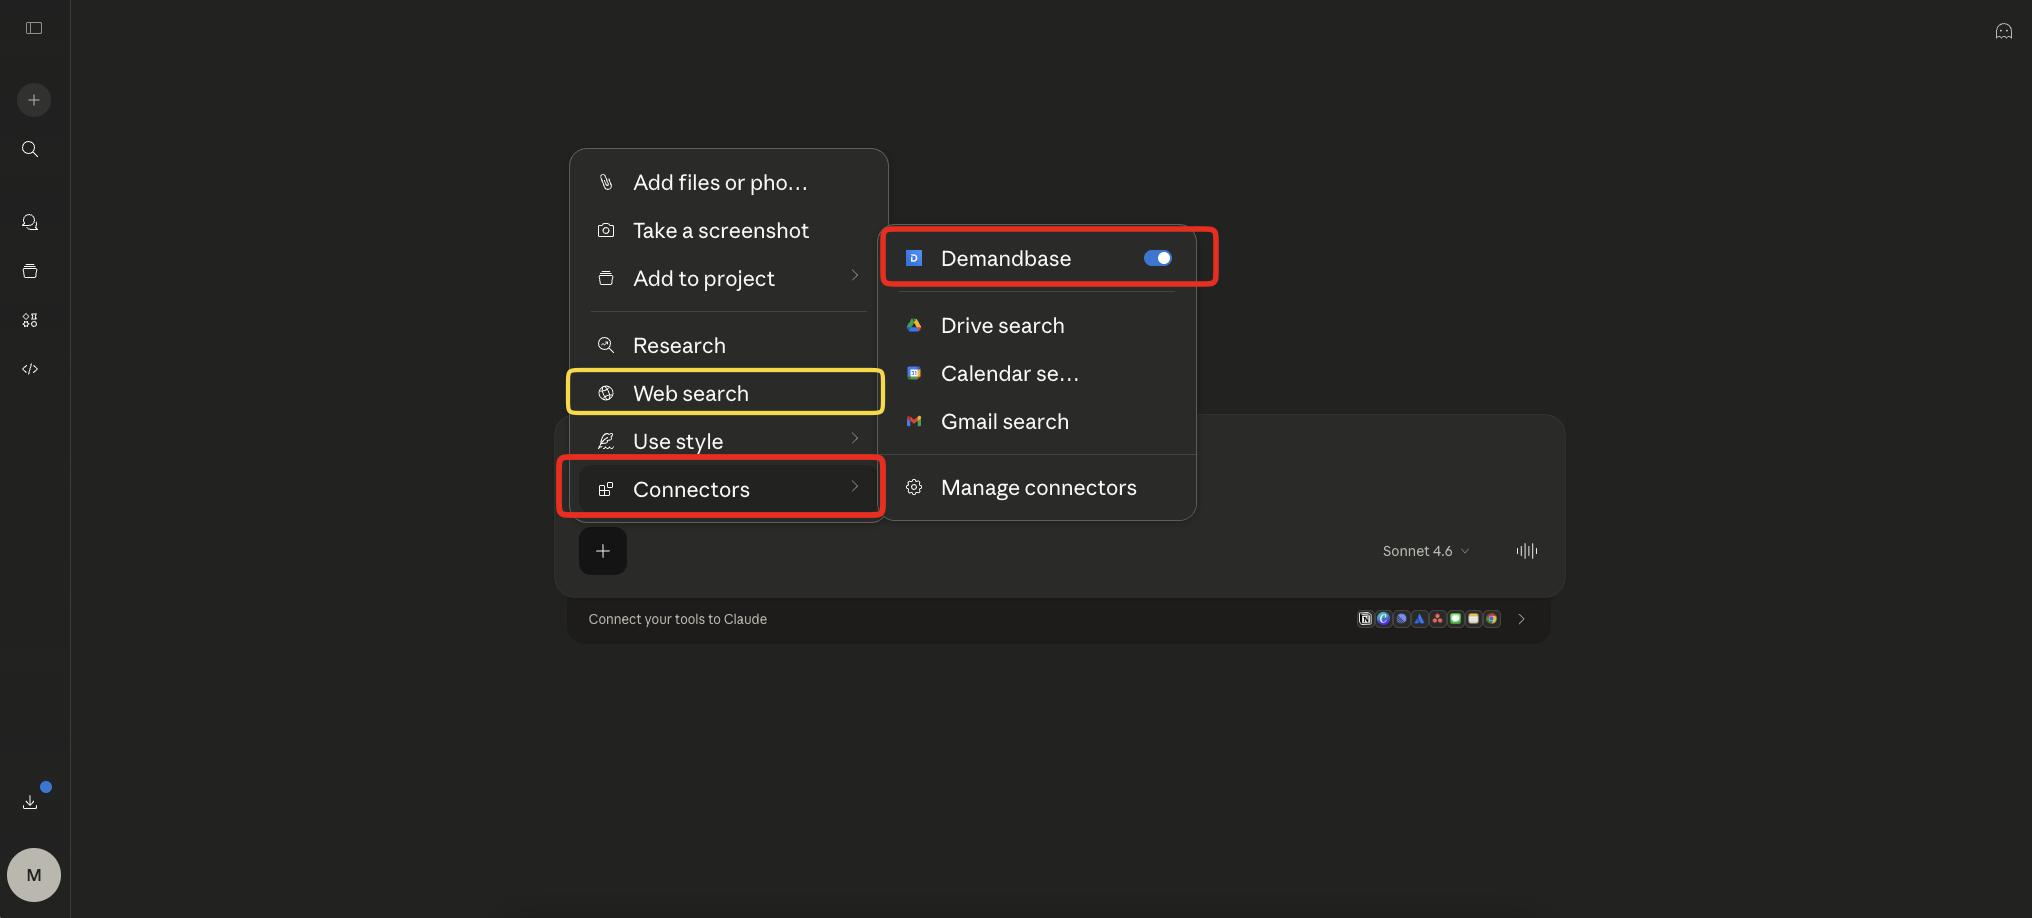
Important: Web search does not need to be disabled for normal use. For a controlled connection test, you can temporarily disable Web search and ask Claude to use only the Demandbase connector.
Step 5: Verify the Connection
Send a low-risk, read-only test prompt, for example:
Use the Demandbase connector to list the top 10 VP contacts at Demandbase.Use Demandbase to show my most engaged accounts in the last 30 days.Use Demandbase to find accounts in my target account list with no open opportunities.Use Demandbase to show companies using Snowflake with recent funding.
Confirm that Claude invokes a Demandbase tool and returns a response based on Demandbase data.
Troubleshooting
I don't see Add custom connector
- On Team and Enterprise plans, only an Owner or Primary Owner can add a custom connector to the organization.
- Ask an organization administrator to add the Demandbase connector under Organization settings > Connectors.
- If you use a Free account, confirm that you have not already reached the one-custom-connector limit.
The connector cannot reach the server
- Confirm that the remote MCP server URL exactly matches
https://gateway.demandbase.com/mcp/servers/db-mcp. - Do not use the older
/mcp/db-mcpURL. - Claude connects to remote MCP servers from Anthropic's cloud infrastructure, not from your local computer or VPN.
Demandbase sign-in fails or access is denied
- Confirm that you are signing in with an authorized Demandbase account.
- Confirm that Demandbase MCP is enabled for your organization and user.
- If access is still denied, contact your Demandbase Account Team or Demandbase Support.
Demandbase is connected, but Claude is not using the Demandbase connection
- Open the + menu in the composer, select Connectors, and confirm that Demandbase is turned on.
- Explicitly tell Claude to use the Demandbase connector in your prompt.
- Review Claude's Tool access setting if you have many connectors enabled.
- For an isolated test, temporarily turn off Web search.
Remove or change the custom connector
Open Customize > Connectors, select the menu next to Demandbase, and remove the connector. To change its name, URL, or advanced settings, remove it and add it again with the updated configuration.
Updated about 8 hours ago